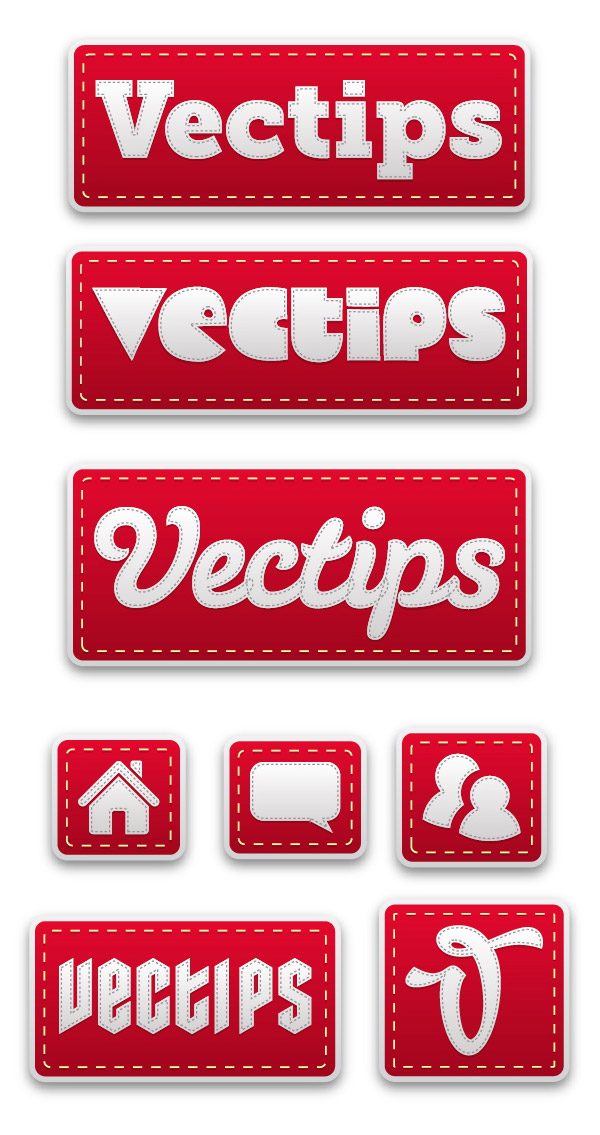
Final Image: Stitched Label Type Treatment
Below is the final stitched label type treatment we will be working towards.

Tutorial Detail: Stitched Label Type Treatment
- Program: Adobe Illustrator CS4
- Difficulty: Intermediate
- Topics Covered: Appearance panel, Effects, gradients
- Estimated Completion Time: 15-20 minutes
Step 1: Stitched Label Type Treatment
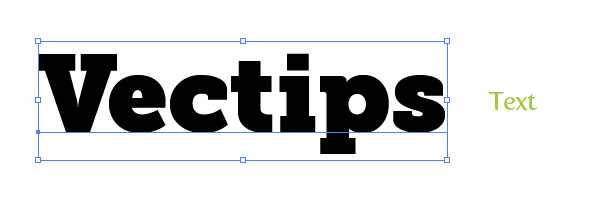
To start off this Stitched Label Type Treatment Tutorial, let’s create a new document and without the Type tool (T) and type out some text. Change the font to whatever you like. I suggest using something heavy like the
Museo Slab 1000 font I am using.
Step 2
Before we start adding new fills and strokes from the Appearance panel, it is good to start with a clean slate. Select you text and take off any fill or stroke.
Step 3
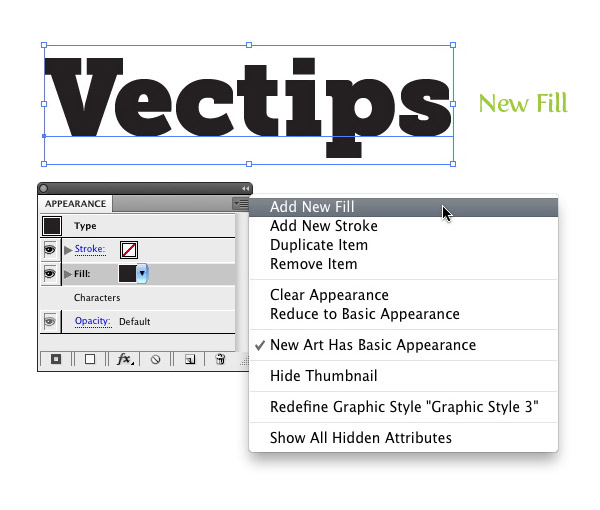
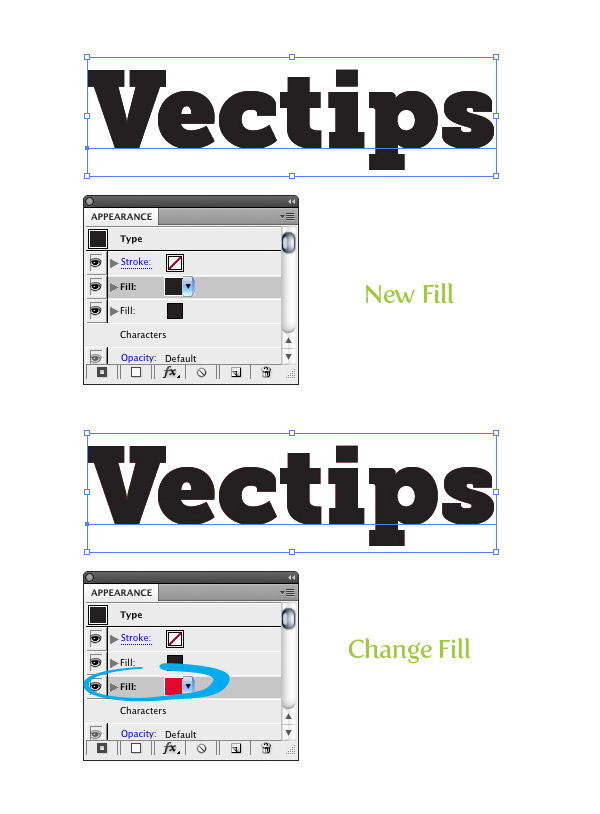
From the pop-up menu of the Appearance panel, select New Fill. Keep the default black color for now, we will be changing it later on in the tutorial.
Step 4
Again, create another New Fill From the Appearance panel. Select the second fill in the Appearance panel and change the fill to a red color.
Step 5
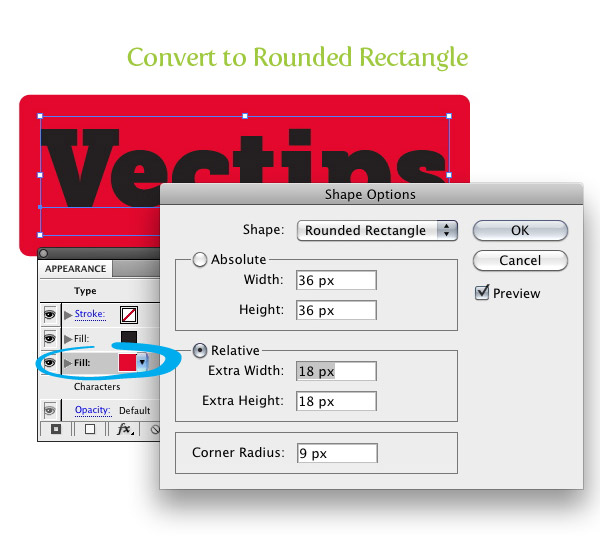
Select the red fill in the Appearance panel then go Effect > Convert To Shape > Rounded Rectangle. When the Shape Options dialog opens select the Relative radial button and change the Extra Width and Extra Height to 18 px. These number might be higher or lower depending on the dimensions of you text.
Step 6
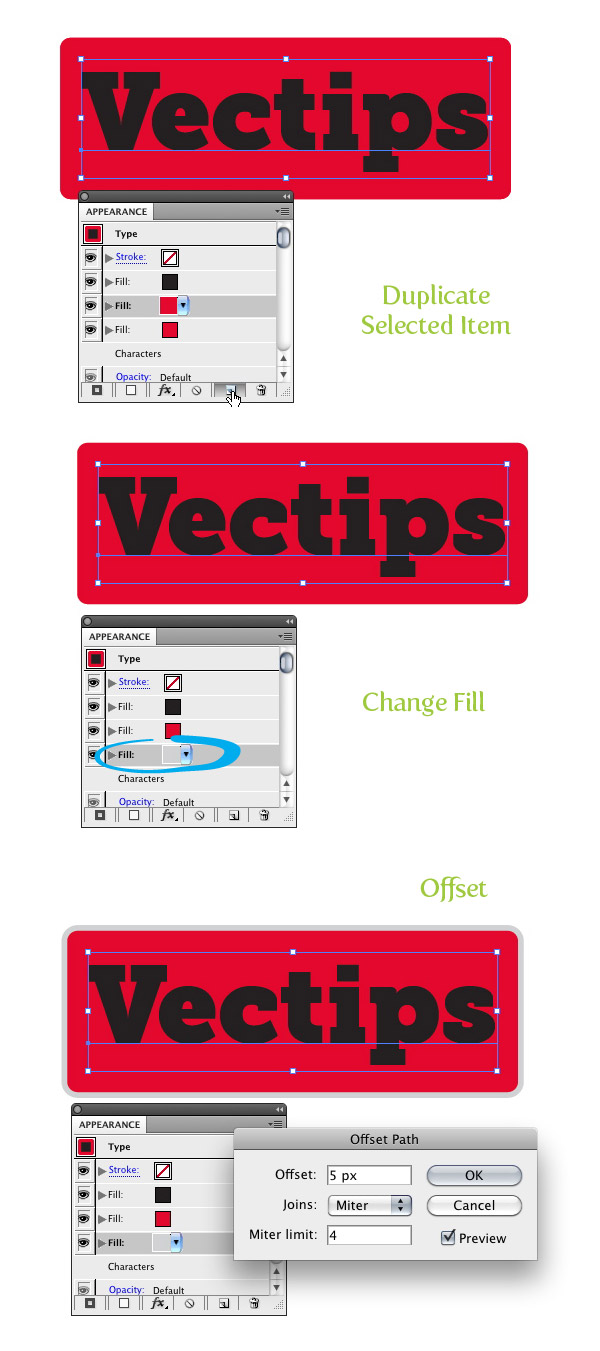
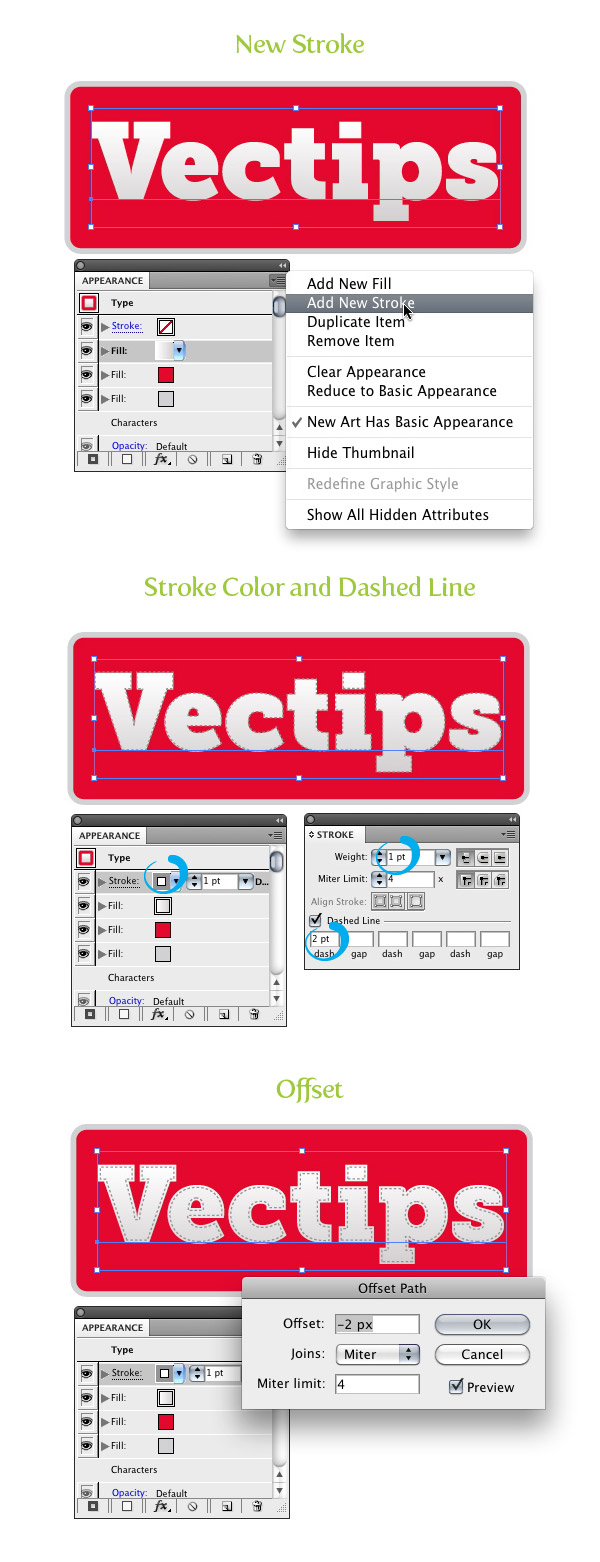
With the red fill selected in the Appearance panel, press the Duplicate Selected Item button at the bottom of the Appearance panel. Change the last red fill in the list to a gray color. With the gray fill still selected, go Effect > Path > Offset and change the Offset in the dialog to 5 px. Just like in the previous step this numerical values might change depending on the size of your text.
Step 7
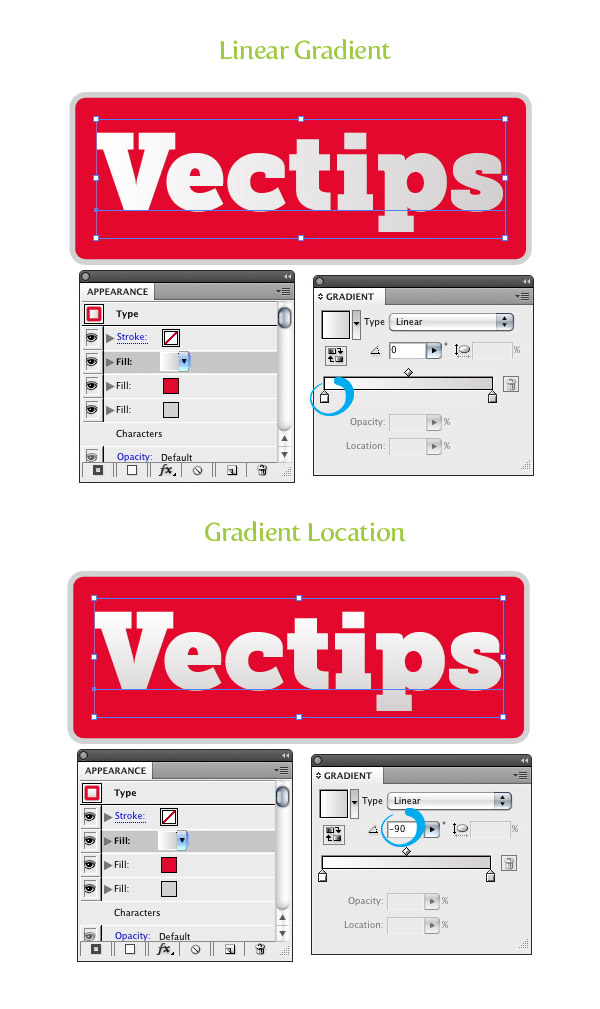
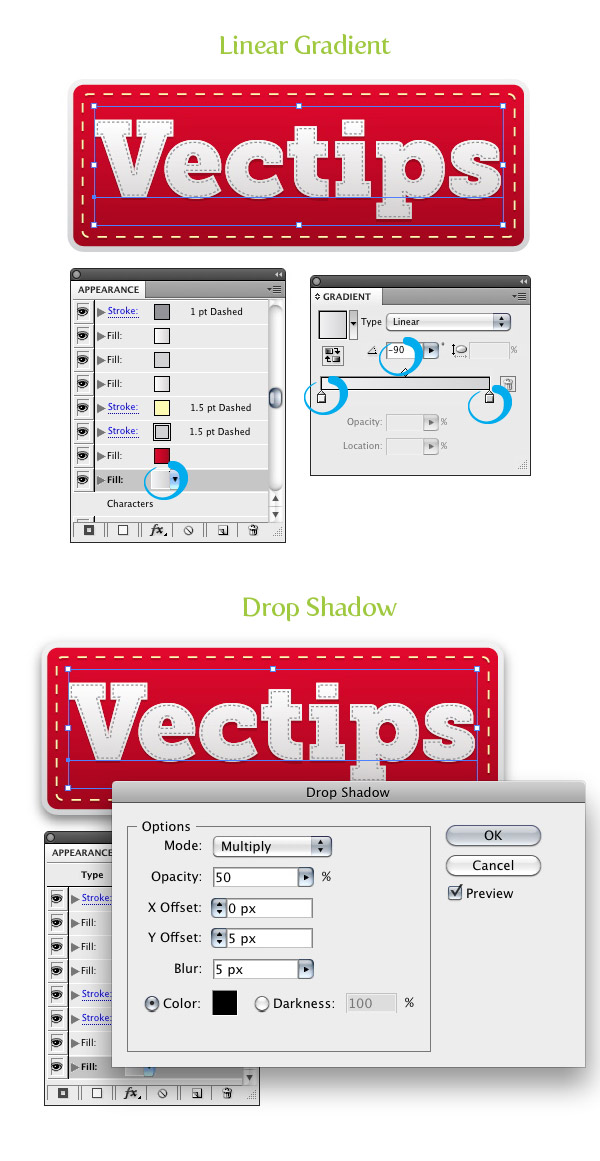
Now that we have all the major shapes done, we can start by add some detail and stitching to the text. To start, select the first black fill in the Appearance panel. Change the fill to a liner gradient with the first color stop in the gradient white and the second color stop a light gray. From the Gradient panel change the Angle of the gradient to -90.
Step 8
With the text selected, choose New Stroke from the pop-up menu of the Appearance panel. Change the color of the stroke to gray, set the Weight to 1pt, check the Dashed Line checkbox, and input 2 pt in the first Dash filed of the Stroke panel. Next, go Effect > Path > Offset and change the Offset in the dialog to -2 px.
Step 9
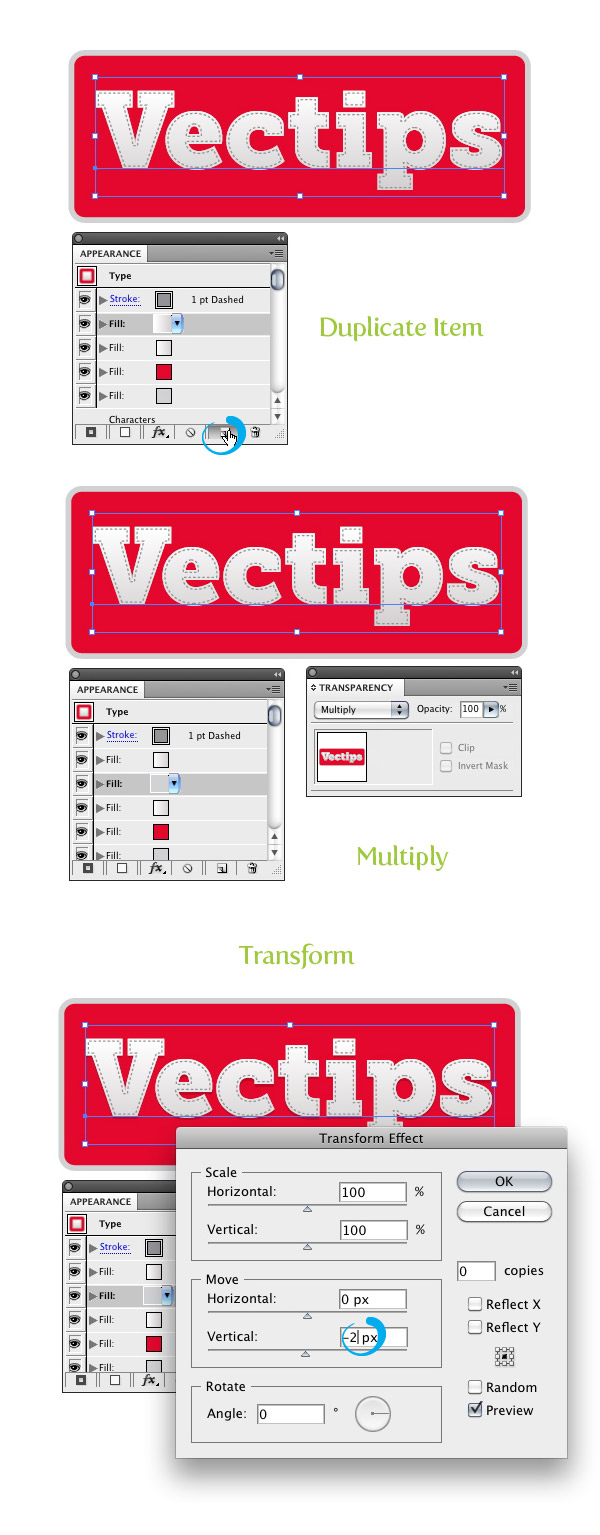
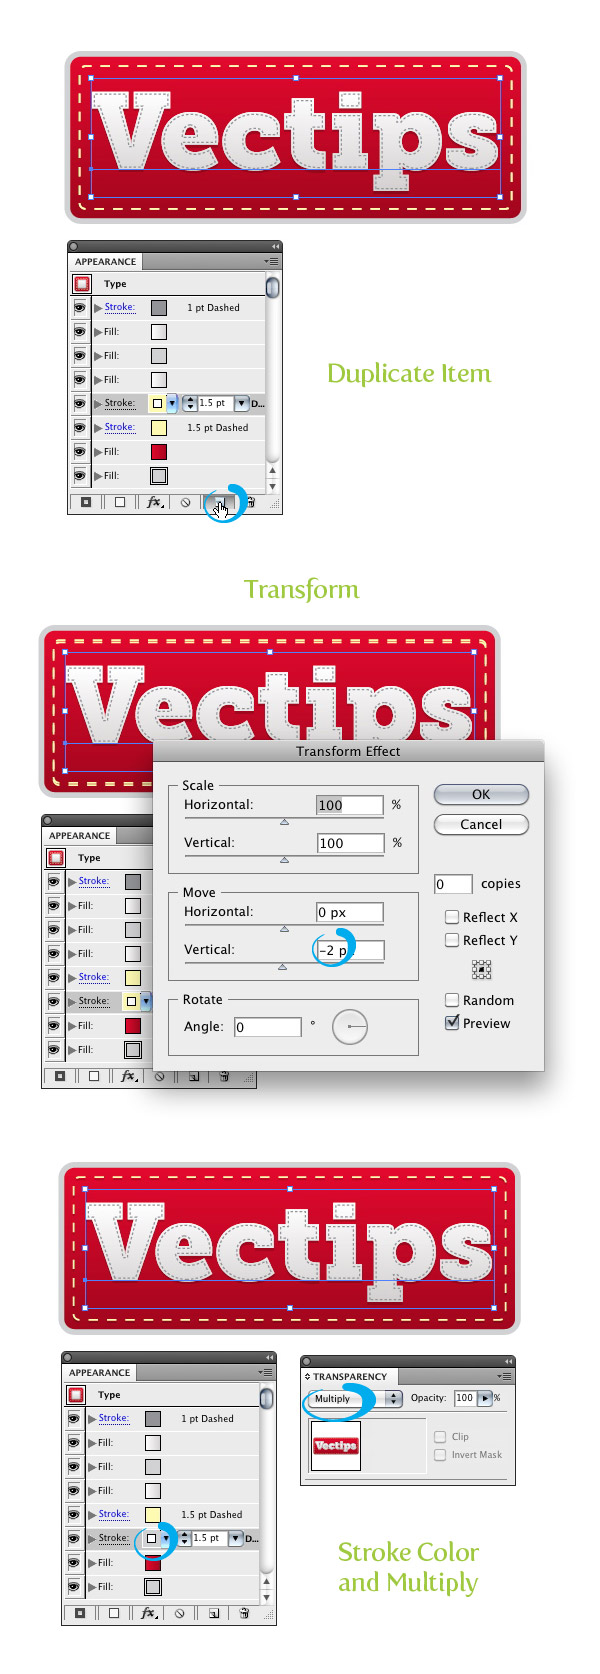
Select the main white text linear gradient fill in the Appearance panel and press the Duplicate Selected Item button. Select the second white text gradient, fill it with a light gray and choose Multiply for the Blending Mode from the Transparency panel. Next go Effect > Distort & Transform > Transform. With the Transform dialog open, change the Vertical Move to -2 px.
Step 10
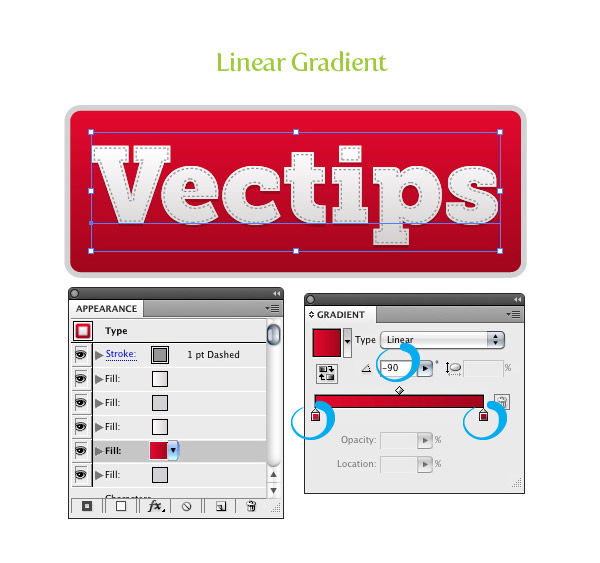
Select the red color fill from the Appearance panel and change it to a linear gradient. From the Gradient panel, change the first color stop to red, the second to dark red, and change the Location to -90.
Step 11
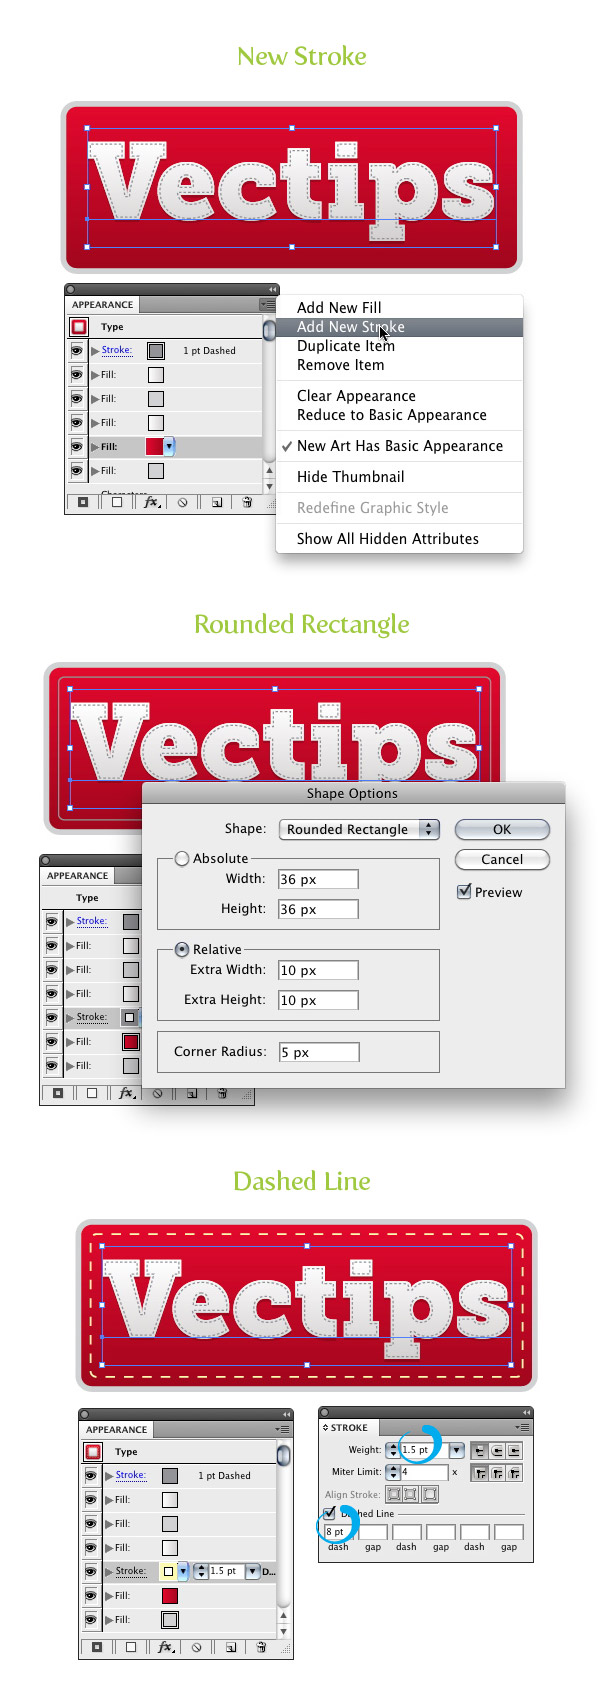
From the pop-up menu of the Appearance panel, choose New Stroke. Next, Go Effect > Convert to Shape > Rounded Rectangle, change the Extra Width and Height to 10 px, and change to Corner Radius to 5 px. Change the stroke to a light yellow color, change the weight to 1.5 pt, and change the Dashed Line value to 8 pt.
Step 12
With the yellow stroke selected, press the Duplicate Selected Item button in the Appearance panel. Make sure you have the second yellow stroke selected and go Effect > Distort & Transform > Transform. In the dialog, change the Vertical Move to -2 px. Next, change the stroke color to a light gray and set the Blending Mode to Multiply.
Step 13
Select the last fill in the Appearance panel list, change the fill to a linear gradient, change the first color stop a light gray, the second color stop to a gray color, and change the location of the gradient to -90 from the gradient panel. With the last fill still selected, go Effect > Stylize > Drop Shadow. In the Drop Shadow dialog, change the Opacity to 50, X Offset to 0, Y Offset to 5 px, and the Blur to 5 px.
Final Image: Stitched Label Type Treatment
Now we have a nice stitched label type treatment. Even better, it is fully editable! You can change the font or even apply it to other vector objects. I suggest creating a Graphic Style to make applying the treatment extremely easy. Simply select your text treatment and press the New Graphic Style button in the Graphic Styles panel. Below are some examples of different text and icons. Have fun!
